Please, read this entire post before attempting any new sitting meditation positions. Otherwise, it’s easy to end up with long-term damage to the knees.
In this post, we’ll run through the different sitting postures and hip-stretching exercises for beginners to adopt a more advanced meditation posture.
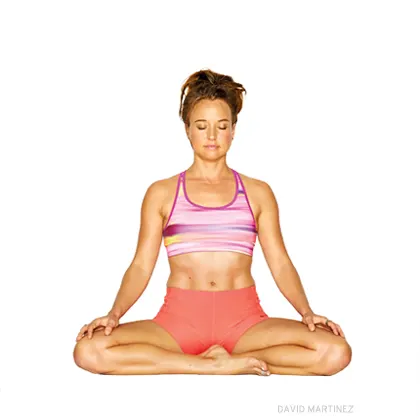
Meditation Posture
How to sit during meditation is an important question to ask before starting the mindfulness practice. Mindfulness meditation provides a host of benefits, and you’re on a rewarding path learning how to do it correctly.
In this post, we’ll run through the most important components of meditation posture and give an introduction to the traditional meditation positions.
Four meditation postures
From a beginner’s perspective, mindfulness practice can be done in one of four postures:
- Sitting
- Standing
- Lying down
- Walking
Most meditation teachers believe that sitting is the optimal meditation posture, as it allows for both focus and relaxation. However, as a beginner, it could be a good idea to try out the various postures and see which best suits your lifestyle.
Beginners may find it easier to start by sitting in a chair or on a sofa. If you prefer crossing your legs and sitting on the floor, it could be a good idea to invest in a meditation cushion and mat. The most important part is that you’re comfortable.
Remember: if you’re uncomfortable during meditation your body will tense up, making mindfulness very difficult. Always try to find a comfortable position before you start meditating.
Good posture is key in a meditation practice and tends to follow the five principles below.
The three sitting classic meditation positions
There are three main positions for sitting on the floor during meditation:
- Burmese, or “beginner” position
- Half-lotus position
- Lotus position
Most beginners start meditating either cross-legged or with the Burmese position, while more advanced meditators may have progressed through the half-lotus and even reached the full-lotus.
The meditation position that’s best for you will be determined by your hip flexibility. Beyond improved focus during meditation, the lotus positions offer significant health benefits and are worth pursuing.
We’ll start off with a quick run-through of the beginner meditation position before offering some stretches and guidelines to help you develop the more advanced yoga meditation poses.
The 5 principles of posture
No matter what meditation pose you’re practicing, 5 key principles will apply to your seated meditation:
- Feet tucked in, soles facing up
- Knees fall lower than the hips
- Neutral, elongated spine
- Open shoulders
- Head balanced
Remember these principles as we discuss the three traditional meditation poses.
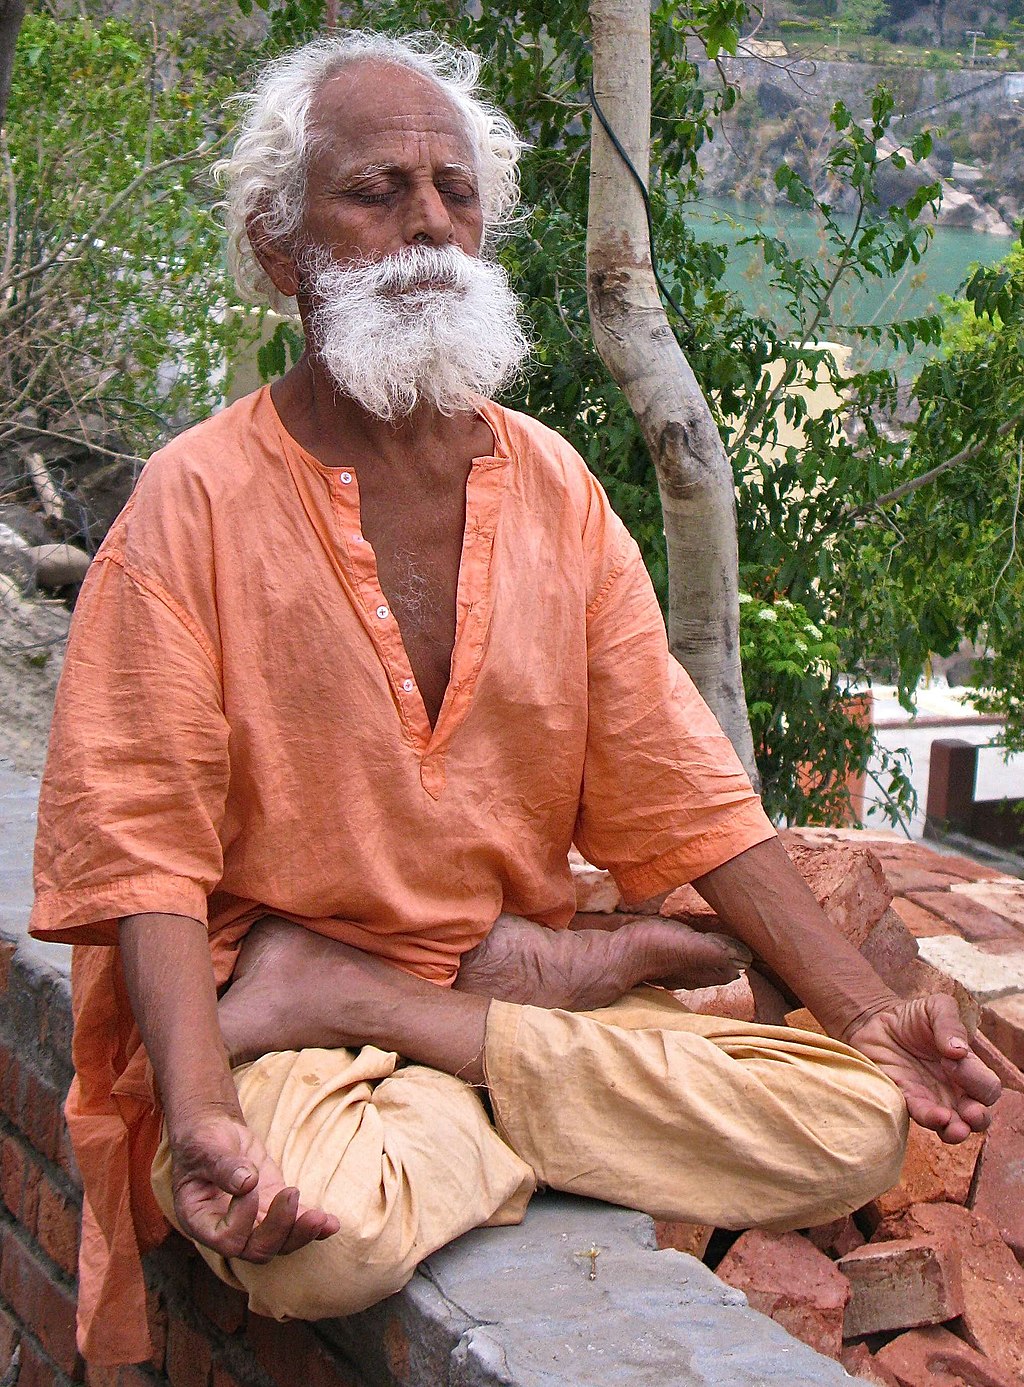
Meditating in the Burmese position
As mentioned above, there’s nothing wrong with meditating cross-legged if that’s how you feel comfortable. However, this “easy position” is the most likely to cause your foot to fall asleep during meditation. There are several traditional sitting positions that offer greater benefit.
Burmese posture, or the “Beginner” position, is the ideal beginner position, as most people are already flexible enough to practice it straight away. It’s virtually sitting cross-legged – but with a few additional changes.
Burmese position really boils down to 4 steps:
- Sit down on your cushion, cross-legged
- Pull in one of your feet to your groin, sole facing upward
- Pull in your other leg in front of the first leg, with the sole of this foot also facing upward
- Straighten your back and open your shoulders by placing your hands on your thighs
Leaning your back against a wall may help keep your back straight during meditation. Maintaining a straight back is one of the 5 key principles of posture, as it supports blood circulation and helps concentration during meditation.
Meditating in the Half-Lotus position
The half-lotus is meant for intermediate meditators who are more flexible than beginners but still can’t manage the Full Lotus.
For your safety, do not attempt the Lotus or Half Lotus position before finishing this article!
Most people prefer one side over the other. Left and Right are used interchangeably in these instructions. Just go with whatever feels comfortable!
The half lotus comes down to 4 steps:
- Start in the Dandasana position (Staff Pose)
- Bend and bring your right knee to your chest.
- Next, bring your right ankle up to your left hip. The sole of your right foot should face the sky, while the top of your foot rests on your hip crease.
- Finally, cross your other leg so your left ankle sits under your right knee.
It’s important to maintain a straight back for both the full benefits of both the lotus and half-lotus poses.
Meditating in the Lotus position
The Lotus position is a traditional pose that prepares the practitioner for deep meditation. It’s ideal for advanced meditators
Lotus offers a whole host of benefits beyond meditation:
- Increases circulation
- Tones the abs
- Strengthens legs, ankles, spine and upper back
- Increases hip flexibility
The full lotus is very similar to the half-lotus, and the only difference is in the last step – where we repeat step 3 for our other leg.
For your safety, do not attempt the Lotus or Half Lotus position before finishing this article!
The full lotus comes down to 4 steps:
- Start in the Dandasana position (Staff Pose)
- Bend and bring your right knee to your chest.
- Next, bring your right ankle up to your left hip. The sole of your right foot should face the sky, while the top of your foot rests on your hip crease.
- Finally, bring your left ankle up to your right hip. The sole of your left foot should face the sky, while the top of your foot rests on your hip crease.
Before attempting Lotus or Half-lotus, it’s important to have great hip flexibility. Otherwise it can cause knee damage over the long-term, if not immediately.
For this reason, it’s important to stretch the hip thoroughly before attempting the Lotus position. If you feel any discomfort attempting the pose, just stop. That probably means you just need to improve your hip flexibility.
Hip-stretching exercises for the Lotus position
The Burmese position is so accessible, you can probably do it on your first meditation. The benefits of the lotus position make it a worthy goal for regular meditators, though limited hip flexibility is usually an inhibitor for beginners attempting the pose.
Before you hurt your knee jumping into the lotus before you’re ready, here are some exercises to stretch out your hips.
Warm-up
- Start in the Dandasana position (Staff Pose)
- Pull your knees up toward your chin
- Place you feet flat on the ground, as close to your groin as comfortably possible
- Spread your knees, letting them fall to the ground (while not forcing)
- Shake you knees up and down, loosening them up for further stretching
This exercise is meant as a 30-second warm-up before moving into the Butterfly Stretch.
Butterfly Stretch (Hip)
Start in the Dandasana position (Staff Pose)
- Pull your knees up toward your chin
- Place your feet flat on the ground, as close to your groin as comfortably possible
- Place the soles of your feet together and spread your knees, letting them fall to the ground (while not forcing)
Practice this stretch until you feel comfortable resting your knees on the ground. Then repeat, pulling your feet in closer to the groin.
Yoga with Adrienne has a great video on hip stretches that we recommend watching, especially after featuring her amazing videos in our post on Yoga Taster Exercise!
Extended Butterfly
- Start with the Butterfly stretch
- Arch your back and lean forward, stretching as far as you can
Practice this stretch until you feel comfortable resting your knees on the ground. Then repeat, pulling your feet in closer to the groin.
Thigh Stretch
- Kneel comfortably, with your knees close (if not touching)
- Spread your feet, so they’re slightly more than hip-width apart
- Slowly lower your buttocks between your feet
- Use a cushion (zafu) for increased comfort
- Hold this pose for up to one minute
Sitting during meditation
Meditation is full of benefits from calming anxiety to cultivating non-judgment and managing expectations, so it’s worth learning to do them correctly.
If you’re a beginner meditator, you’re probably focused on sitting in a chair or cross-legged on the floor. That’s perfectly ok! This post was meant as an overview of meditation postures. It started with easy positions and gave some insight to where you may be a few months or years down the line.
The most important aspect of meditation is that you’re comfortable. You should also try to follow the 5 principles, but only to the point that you’re comfortable in your meditation practice.
Please leave any questions or comments below. Feel free to share on social media.
Read on, for the complete Beginner’s Guide to Meditation. Or learn specifically how to breathe during meditation.